Napier grass (penisetum puperum)
User Rating: 3 / 5


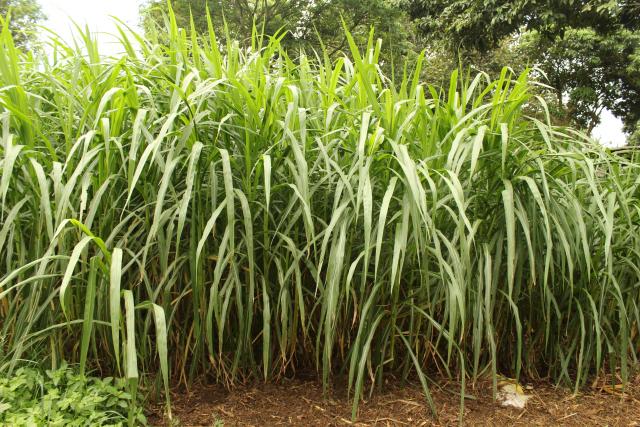
Elephant or Napier grass (penisetum puperum) is a perennial grass which can grow to 4 – 5 m high if left undisturbed. Leaves range from hairy to smooth types. The grass is not suitable for grazing as it cannot withstand trampling by livestock. However it can be used for stall feeding and zero grazing when chopped into smaller sizes. It is also suitable for silage.
A number of varieties are available but the common ones are French Cameroon, Bana grass and Kakamega 1.
Advantages
- High yielding;
- Good palatability;
- Good nutrient content when young (dark green, less than 1 metre tall);
- Easy to establish and persistent;
- Drought tolerant;
- Very good for silage making;
- Prevents soil erosion and can serve as a wind-break;
- Can be intercropped with forage legumes such as desmodium.
Disadvantage
- Not suitable for direct grazing;
- Attacked by various fungal diseases in some areas, such as headsmut in Central Kenya – some varieties are more prone to disease than others;
- Takes a lot of nutrients from the soil - requires a lot of manure/fertilizer to get high yields;
- Not very frost tolerant
Cultivation
| Climate |
Napier grass can be grown at altitudes from sea level to 2,000 m – any higher, growth and regeneration after cutting is slow and it may die after frost. It does best in high rainfall areas, over 1500 mm per year, but survives well in droughts due to its deep root system. |
| Soils |
Napier grass can grow in almost any soil but does best in deep, fertile, well drained soils. |
| Site |
Napier does best as a pure stand. To save labour, under cut-and-carry systems, it is recommended that the plot be situated as close to the zero-grazing unit as possible. Napier may also be planted to prevent soil erosion such as in strips along contours, along river banks and on steep slopes which are unsuitable for growing food crops. |
| Preparation |
Prepare site by ploughing or digging. Make sure the site is weed free at the time of planting. |
| Planting |
The best time to plant Napier is at the beginning of the main rainy season. Wait for two heavy down pours before planting. Either canes or splits can be used for propagation. Canes require less labour and planting material. If using canes, select mature Napier and cut a length with three to four nodes with buds from the middle part of the cane. Plant canes at an angle of at least 45 degrees. To use splits, cut the Napier plant to 10 to 15 cm above the soil. Uproot and divide into small parts. Each part should have some roots covered with soil. Allow 0.5 m between plants and 0.5 m between rows in high rainfall areas and 0.5 m between plants and 1 m between rows in low rainfall areas. An alternative method of planting napier grass is where several splits or canes are planted in big round or rectangular pits. This method is referred to as “tumbukiza.” For round pits, dig pits 60 cm in diameter, 60 cm deep and 60 cm apart. For rectangular pits, dig 60cm deep by 60 to 90 cm wide. The length can vary depending on available land. The pits should be 90 cm apart. Separate top soil from sub-soil. Mix about 20 kg of top-soil with about 40 kg of manure and put into each round pit or 90 cm of a rectangular pit. Plant 5 to 10 cane cuttings or splits in every round pit or for every 90 cm length of the rectangular pit. Cover and leave about 15 cm unfilled space at the top of each pit. |
| Fertilizer |
Apply compound fertilizer (NPK: 20-20-0), 1 teaspoon per hole at planting time. After establishment, return as much as possible of the cows’ manure back to the Napier. If practicing zero grazing, collect slurry and apply after every cutting in a furrow between the Napier rows. If applying dry manure, work it into the soil. Apply NPK (20-10-10 or 20-20-0) fertilizer during heavy rains at the rate of 4 teaspoons per plant. Additional topdressing may be done using CAN at the rate of 1 teaspoon per plant after cutting. |
| Weeding |
Keep the plot weed-free, especially after initial planting. Once established, Napier grass is able to suppress most weeds other than very stubborn ones like couch grass. Weed after every cutting and avoid heaping soil around the plants. |
| Pests |
Napier is relatively free of pests and diseases but it is susceptible to Napier headsmut in some regions. Control by removing and avoiding infected material and planting resistant varieties, such as Kakamega 1. |
| Harvesting |
Harvest from 3 to 4 months after planting, when the Napier is about one metre high. Cutting interval varies depending on rainfall but generally harvest when the Napier is about one metre high. Cut the plant to about 5 cm from the ground during the rainy season and 10 to 15 cm during the dry season. With good climate, soil fertility and management yields can be over 25 tonnes (dry matter) per hectare per year. Yields of about half this amount can be achieved with little or no fertilizer. |
| Feeding |
Fresh material is commonly fed in stalls under cut-and-carry system. Chop the material into pieces about 5 cm long to avoid wastage. Do not graze directly. Excess Napier grass can be made into good quality silage. If it is not possible to make silage, leave a portion of the plot standing and continue to harvest the rest at the optimum height. When necessary, use the tops of overgrown Napier to feed cattle. The old canes can also be used as mulch or they can be made into compost manure. |